

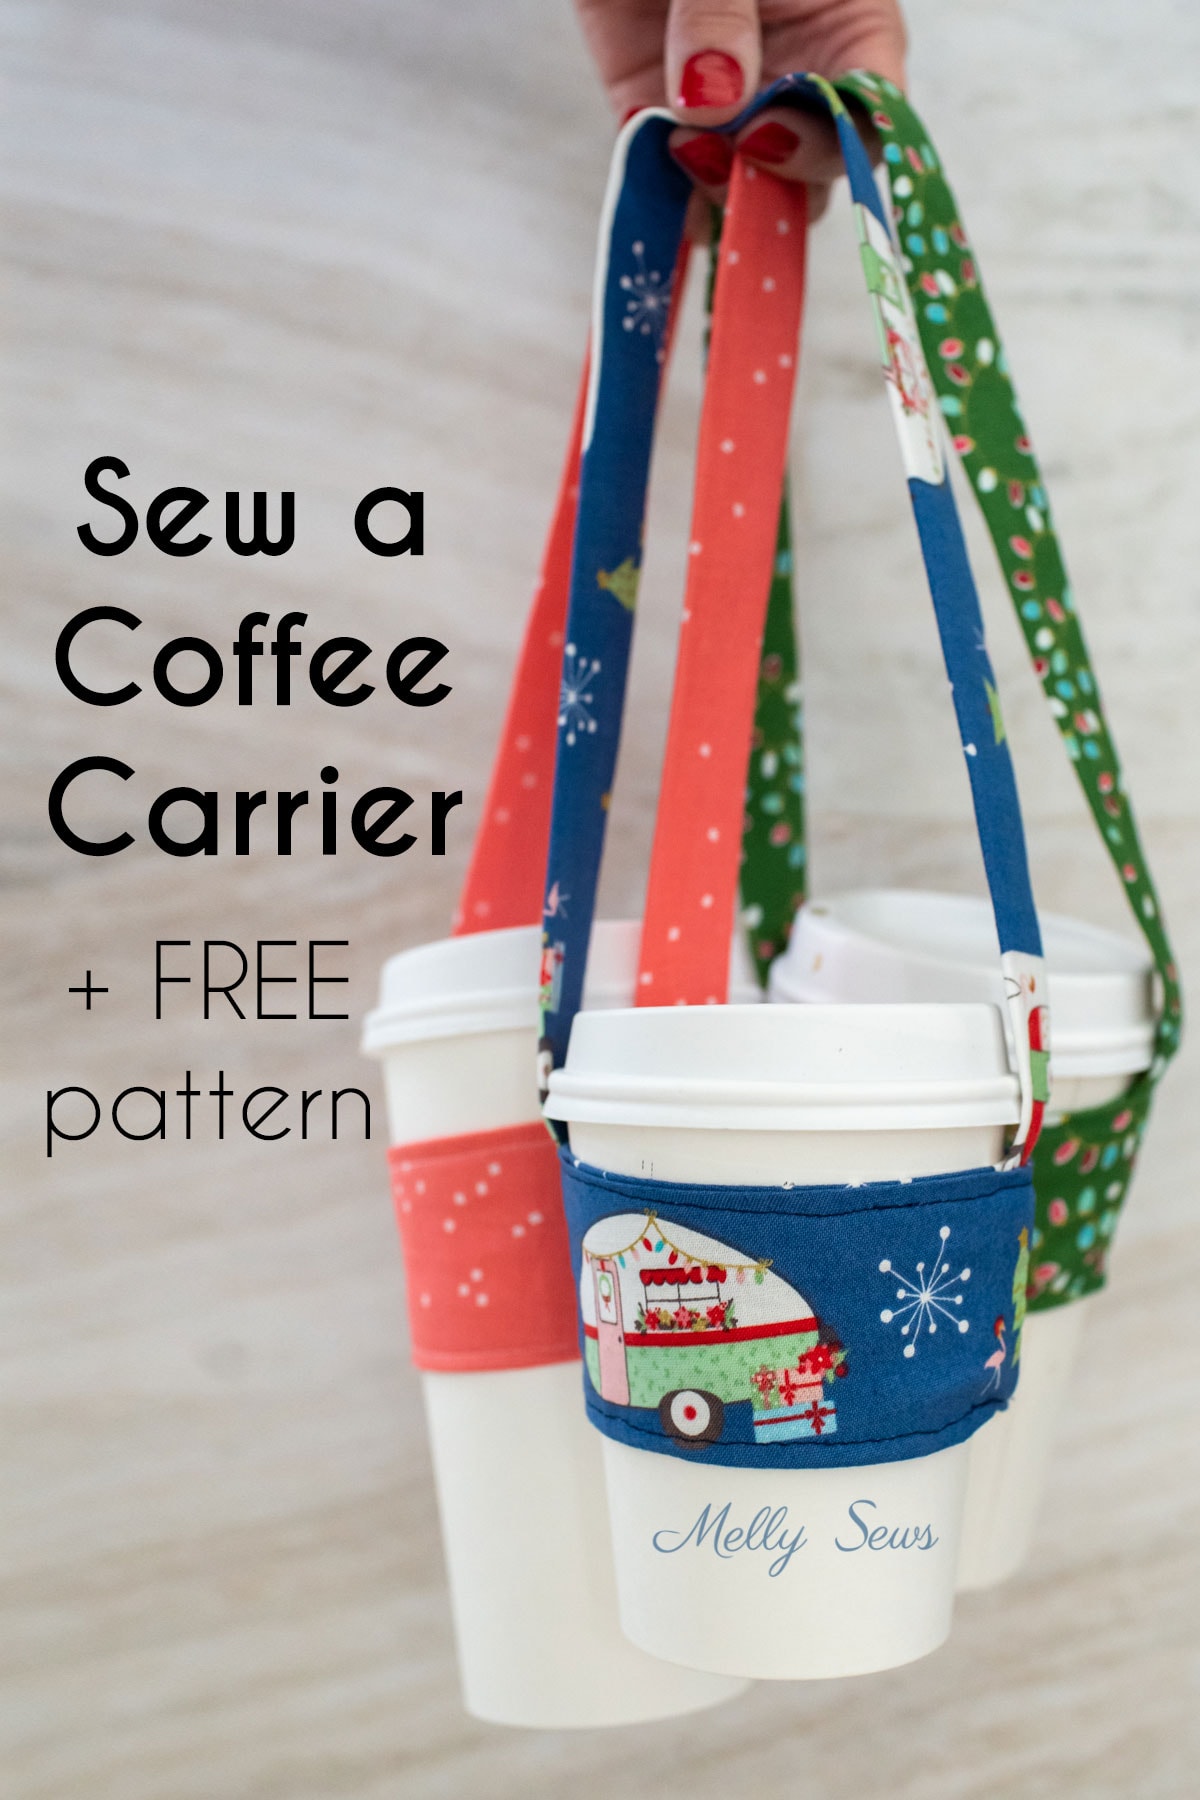
Check out this fun and easy DIY drink holder carrier tutorial. This is a great gift to sew for the holidays for your friends and family

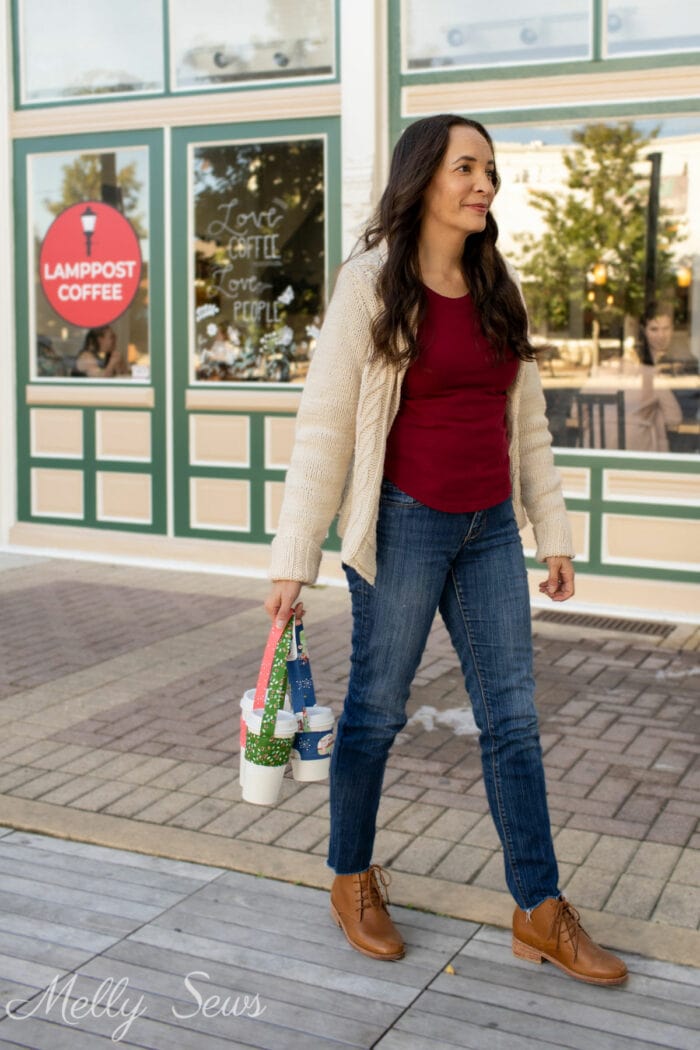
Hey y’all, today I’m sharing a pattern and tutorial to make a coffee cup carrier. This is a way to carry your favorite drink and beverages for a few other people without having to deal with an unwieldy cardboard serving tray cup holder. This DIY project can be sewn up quickly from small scraps of fabric. Each one of these carrier straps is lightweight and foldable. So you can easily stuff a few in your bag, and they’re reusable!
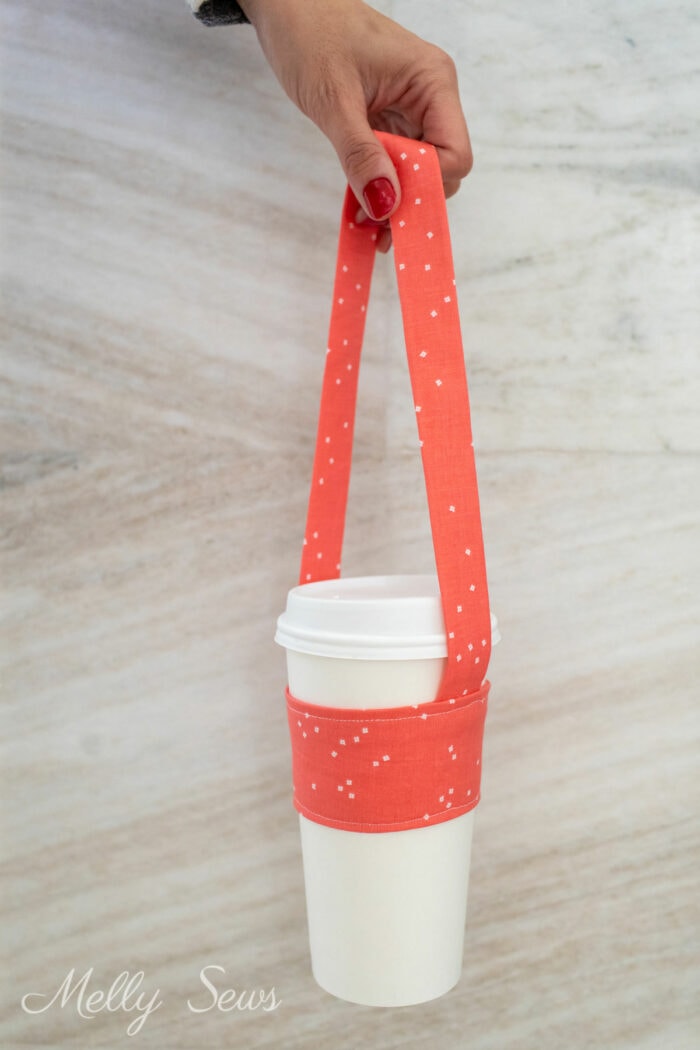
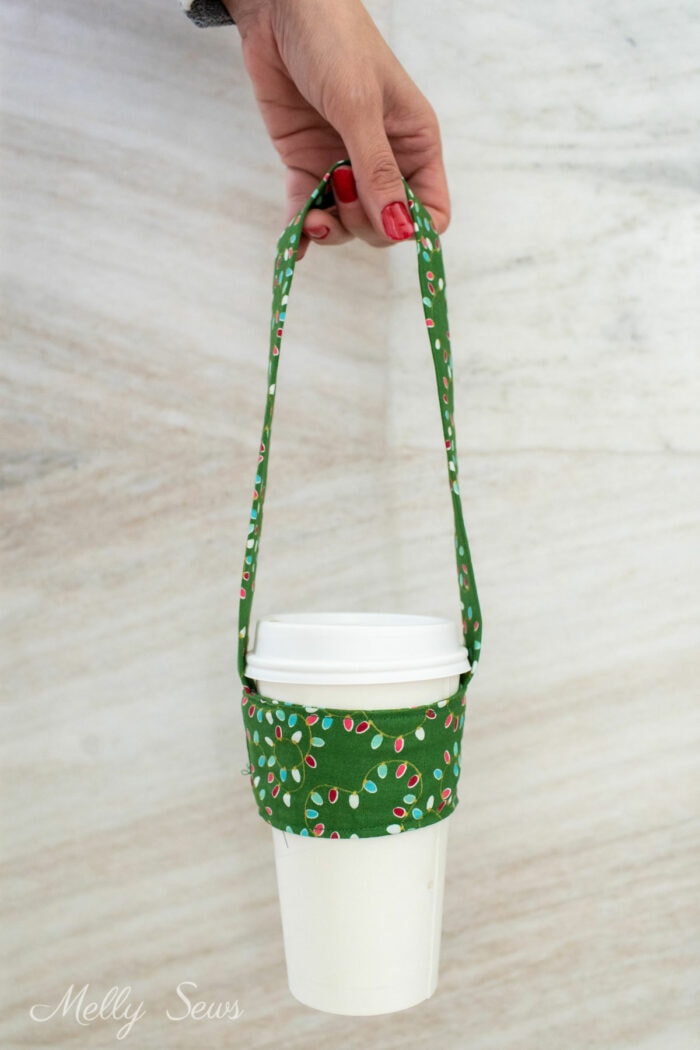
I worked on this pattern to make sure it would fit several different regular cup sizes. All of these samples are sewn from the same pattern, and are the same size. However, you can see that depending on the size of the cup the sleeve part sits at a different depth on the cup. The cups shown are 12 oz, 16 ounces and 20oz.
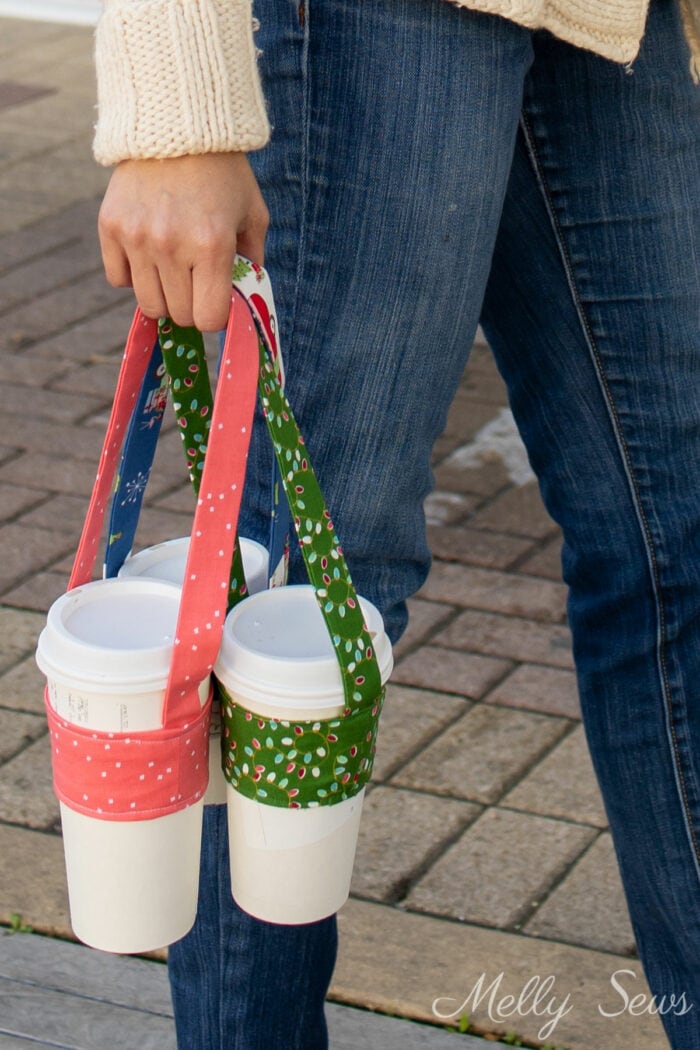
These only work on cups with slanted sides and no handles; if you’re interested in sleeves for mugs, check out this post instead. These carriers should work just as well on cold beverages as they do with hot ones, lowering your risk of spills.
I wish I had these when my kids were little. That way, instead of my hand tied up balancing a disposable cup holder with compartments as I left the coffee shop, I’d be able to hold these straps as well as a kid’s hand and still keep my drink upright. Another advantage to this type of DIY cup holder is that you can drink from your drink without taking the holder off the cup.
Fabrics for Coffee Sleeves
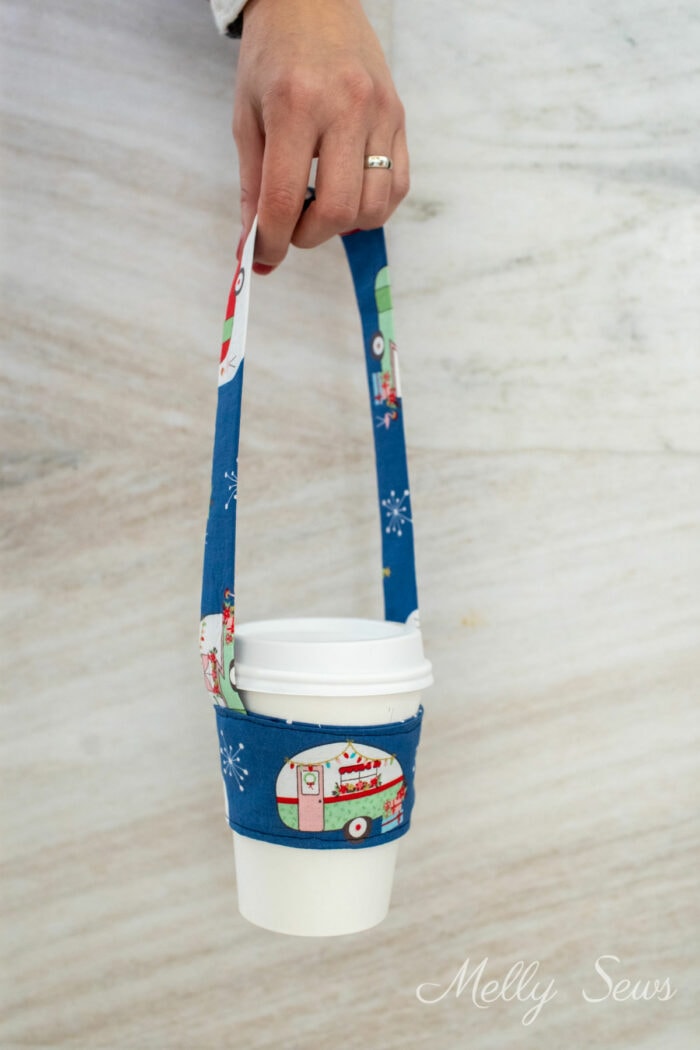
The fabrics I used for these samples are all from Riley Blake Designs. The coral is Blossom Salmon, and the two holiday ones are from my friend Bev’s collection Christmas Adventure. I think these are great gifts to sew for teachers, neighbors, and as stocking stuffers. You could also make the sleeve part reversible if you cut from two different fabrics. Alternatively, you could also piece smaller scraps together for the handle and for the sleeve to use up even irregular fabric scraps.
If you wanted to modify this cup carrier to work as a bicycle cup holder or a DIY crutch cup holder or walker drink holder, it would be really easy to cut the strap at the top, poke the raw edges to the inside and topstitch across the cut ends, then add velcro to the cut ends. That way the strap could go around the handlebar on a bike or a cross bar on crutches or a walker.
This post contains affiliate links. As an Amazon Associate I earn from qualifying purchases. All affiliate links are identified with (affiliate link) after the link or a commissions earned statement above the link(s).
Materials for a DIY Drink Carrier
To make your own coffee cup carriers, you’ll need:
- Fabric. I used quilting cotton to make mine, but lightweight canvas, linen, and other light to medium weight woven fabrics would also work. If you choose a medium weight fabric for the outer part and strap, I’d suggest using a lighter weight fabric for the sleeve lining.
- Lightweight fusible interfacing. This is optional, however if you add the interfacing the carrier will be more durable.
- Sewing machine & basic notions
- The pattern – see below for instructions to get it.
How to Get the Free Cup Holder Pattern
To get this pattern, you must either be a free newsletter subscriber or have purchased a gallery access pass. Then click your preferred option from the buttons below. Existing newsletter subscribers should look at the bottom of the most recent Friday newsletter for the current free pattern gallery password. If you purchased the all access pass you’ll log in to your shop account to download the pattern. Note that the free version of the pattern does not have printable instructions so you’ll need to refer to this post for instructions.
Video Tutorial for a Coffee Cup Carrier
To see how to sew these cup carriers, check out the video below or on YouTube here. These are a quick sew, but the order in which you sew the seams is important so that you’ll be able to turn your carrier right side out.
How to Sew a ReUsable Coffee Holder
For written instructions to sew the holder, see below. But I do still suggest watching the video above at least once, especially to clarify step 6.
Time needed: 15 minutes
How to Sew a Beverage Strap Carrier
- Cut out the pattern
When cutting, make sure that the sleeve part of the pattern is cut on the fold of the fabric. If your fabric is directional, like the camper fabric I used, then remember that the longer edge of the sleeve is the top. The text on the pattern is also oriented correctly so that you can tell the top from the bottom. Cut 2 sleeve pieces on the fold, 1 handle on the fold, and one sleeve of fusible interfacing. Also cut 1 strip of interfacing 1 inch wide and 18 inches long for the handle.
- Add interfacing
Fuse the interfacing to the wrong side of one sleeve piece. Fold the strap in half, wrong sides together, and press. Then fuse the interfacing strip to the wrong side of the strap.
- Prepare the strap
Start by folding the handle strap in half, right sides together, matching long edges. Then stitch down the long edge with a 1/2 inch seam allowance. Turn right side out, using a tube turner or other method. Finally, press the strap so that the seam is on one edge. Add topstitching if desired.
- Mark the center of the sleeve top and sew.
Mark the center on the top of one side and leave a 1 inch gap here, half an inch to either side of the center point. Next, place the sleeve pieces right sides together and then you’ll stitch the top and bottom edges. Start and end your stitching about 1 inch from the ends of the fabric and remember to leave the gap on the top edge.
- Press the sleeve
Turn right side out and press, pressing seam allowances toward the inside on the ends and in the gap.
- Sew the sleeve into a loop
Next, fold the sleeve so that the two interfaced ends are right sides together. Unfold the seam allowances and hold the other ends of the sleeve out of the way. Stitch, then re-fold seam allowances down. Now roll up the sleeve so that you can wrap the two non-interfaced ends around it and place them right sides together. This is basically the burrito method. This is also the step that the video might help you visualize. Stitch.
- Add the handle and topstitch
Place the raw ends of the handle strap into the gap and the seam gap on the top edge of the carrier sleeve, making sure they’re exactly across from each other. Pin in place. Pin the seam gap on the bottom closed. Finally, topstitch around the top and bottom edges to close the gaps and secure the strap in place.